How to copy a DVD using DVD Shrink 3.1.x (Old Version)
This guide shows how to copy a DVD to a single DVD±R using DVD Shrink 3.1.x. This is an older user guide considering.
Step 1
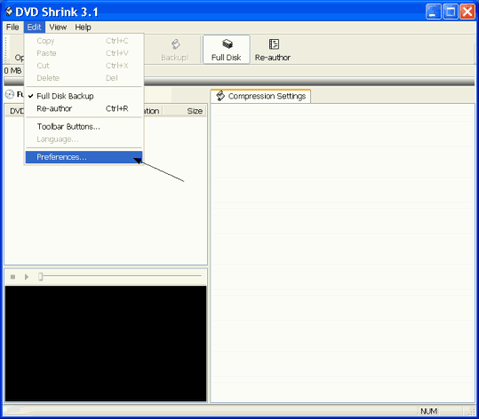
Let's open DVD Shrink 3.1. We may need to change some settings first so select Edit -> Preferences.
Step 2
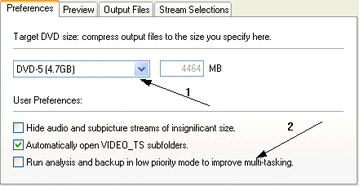
In the first tab make sure that DVD-5 is selected as the target size. (1) Select Automatically open VIDEO_TS subfolders. Now, the low-priority mode helps your computer and if you plan to do other things while encoding and your PC is not that fast I suggest you check it. If you just leave it alone to do the encoding or you have a fast PC I suggest you leave it unchecked.
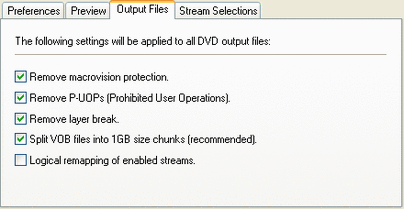
In the Output Files put the settings as you see them here (they are the default ones).
In the other two tabs, Preview and Stream Selections put whatever you think the best. (Stream selections, just save your time, but you better select them differently for every DVD).
When you're done click OK.
In the other two tabs, Preview and Stream Selections put whatever you think the best. (Stream selections, just save your time, but you better select them differently for every DVD).
When you're done click OK.
Step 3
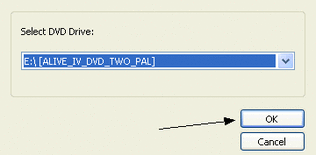
After you're done with that click the Open Disc button in the main DVD Shrink window and there select the drive that you have the DVD you want to copy in. Click OK.
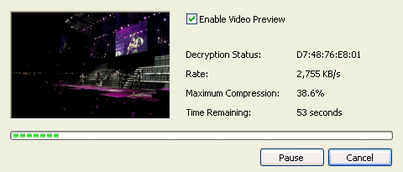
Then DVD Shrink will do a small analysis of the DVD and it is going to load it in the main window.
Step 4
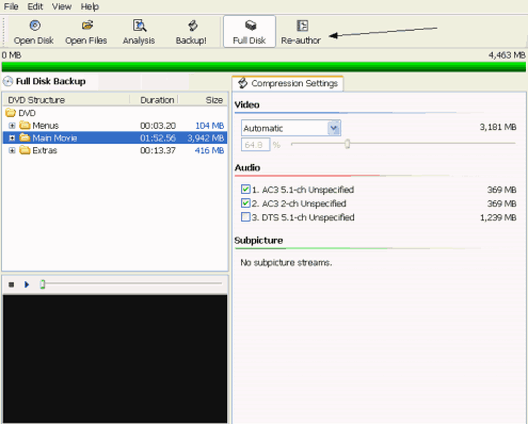
This is how DVD Shrink should look after the DVD is loaded. See the bar that is all green? It shows that DVD Shrink has automatically set the compression and now we can make our copy. If you want to keep everything (menus, extras etc) click Backup! now.
What I suggest is that you keep only the main movie so that you get much better quality. To do that click Re-author.
What I suggest is that you keep only the main movie so that you get much better quality. To do that click Re-author.
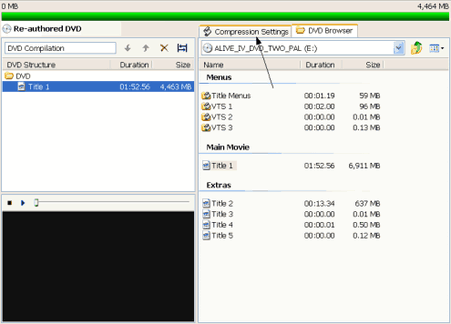
Step 5
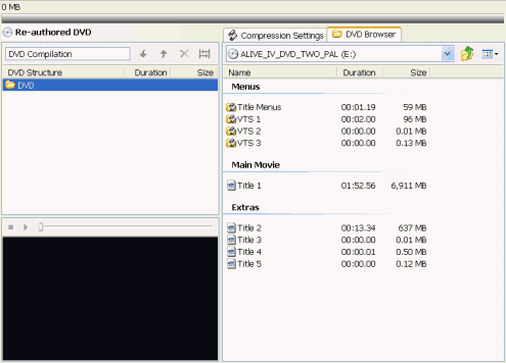
This the the screen you should see after clicking Re-author. You can drag-and-drop anything you want from the right to the left and it is going to be included in your DVD. Be carefull: drop only the main movie and any extras you want, the menus are not going to work this way, you have to back-up the full disc. Now copy the main movie in the left.
Step 6
The main movie is now in our re-authored DVD. Now click Compression Settings.
Step 7
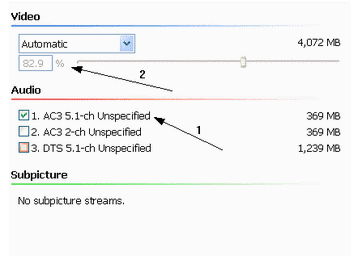
These are the compression settings. They are the same as we know them from 3.0 Beta 5, just the look has changed. I suggest you leave only one Audio stream to save space. Leave compression to Automatic it just gets you the best quality you can get. At Subpicture you can select subtitles, not shown here but select as many you want as they are about 1 MB each.